The Killing Tree: 4 Attributes of the Perfect Stand
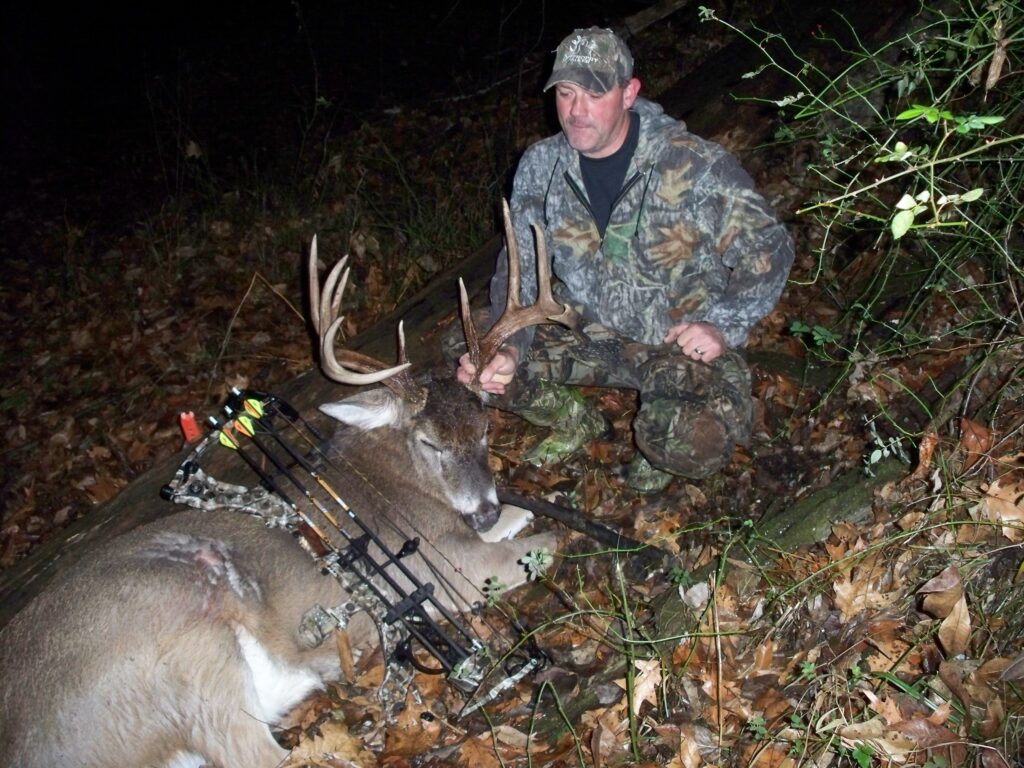
Some locations are good year after year. Finding the right tree based on land features that direct deer movement is an art, but once your find the right place, you annual success is bound to rise. By Bernie Barringer Most hunters never see a Boone & Crockett scoring buck, much less have a chance to shoot one. Yet I have a bowhunting friend named Jim who shot two of them, one a typical and one a nontypical, only three years apart. What makes this feat even more impressive is the fact that he shot both of them, and a handful of other mature bucks, from the same tree. He hit the treestand lottery in a way, finding a stand that is in a great location year after year. This location has a lot going for it, including a food source, terrain features that funnel deer movements and access that allows for minimal intrusion. I believe there are five attributes to the perfect treestand, one that produces sightings of big bucks year after year. Let’s have a look at these features. Terrain Certain things cause deer to move in certain ways. Topography is one of them. Ridges, creeks and rivers, ditches or draws, funnels, benches, swamps and even highways can influence deer movement. Sometimes these land features that influence deer movement can be subtle and sometimes they jump right off a map at you. You put a stand in there and here comes the deer. Yet, sometimes they are a mystery. Deer sometimes use the same trails for generations, but there is no clear feature of the land that would indicate why. Only the deer know why they use these areas, so don’t ask questions, just take advantage of the situation. The stand where Jim killed those two B&C bucks has a drainage that funnels deer out of a park onto the surrounding farm fields. It’s a natural passage that allows the deer to remain concealed until they step out into the field and they take advantage of the terrain, which brings up feature number two. Security Mature bucks need to feel secure or you simply aren’t going to see them during the daylight. The killing tree is going to be in an area where the deer feel comfortable moving about. This means that you must offer them areas that are not violated for any reason other than trailing a deer that has been shot. You can go into these inviolate areas and look them over in the spring when you are shed antler hunting, but from two months before hunting season right through the season, no one goes in there for any reason. The deer will use these inviolate areas for bedding and security. They will be buck magnets during the rut as the bucks cruise from one bedding area to another, checking for does coming into estrus. Your perfect stand site will take advantage of these areas without being too close to them. And the travel corridors from those sanctuaries to the areas where the deer feed must be as free of intrusion as possible. Favorable Winds Even the perfect stand site won’t do you much good if you can only hunt it in one particular wind. You might miss the majority of the rut waiting for the right wind. The best sites can be hunted in a variety of winds and tend to be forgiving of wind swirls. Stands on ridges tend to allow your scent to blow over the top of the deer. In the case of Jim’s stand, the draw tends to funnel evening wind currents out into the field where they dissipate. In the morning, the warming thermals take the scent up and away, and in the evening the cooling air is drawn down to the low ground where it is harmless. Of course we take into consideration the importance of wind when choosing the stand site, but we must also consider the wind as we access the stand. Free Access This is the area where most hunters overlook. The killing tree must have a way to get into it and out of it without spooking deer. The perfect site isn’t going to work for many hunts if you can’t get to it without spooking deer, or you can’t get out of it without blowing deer out of a field. Smell is important so you must consider the wind direction, but you also must consider sound and sight. Can you get to the stand without making a bunch of commotion crunching through dry leaves or exposing yourself along the edge of a field? Big buck hunters who are consistently successful go to extremes to combat these issues. I know of one who planted a row of pine trees along the edge of his field so he could walk behind them concealed. In another case a hunter left a few rows of corn on the edge of the field to hide his approach. Using a ditch is a perfect concealment tactic, and you can clean the leaves out to make it quiet. Take a chainsaw in the summer and cut down trees out of the ditch so you can walk in with a minimum of effort and noise. I once read that trails cut to the stands on the edges of food plots should not be made straight, but be cut so there is a curve at the end where the stand is located so deer can’t see you walking down the trail from a distance. Good idea. The perfect treestand site, the one that will become your go-to location year after year can be hard to find and it can take some effort to develop. Sometimes it can be a mystery why some treestands seem to produce year after year, but most often, it’s a combination of these four factors that make a particular site the location for the perfect killing tree.
RULE THE RUT with these 3 overlooked tree stand sites
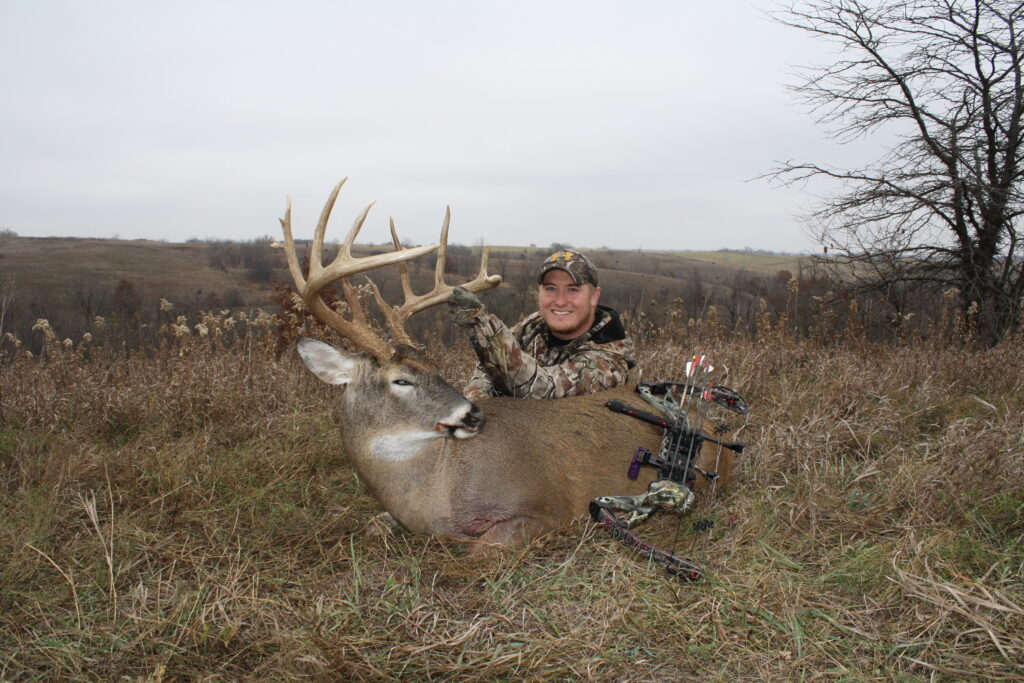
These three terrain features are quite common across much of the whitetail’s range, but few hunters look for them. Here’s how to find and capitalize on these overlooked locations. By Bernie Barringer All serious whitetail hunters live for that magical time of the year; those three weeks in November when something amazing can happen at any moment. Bucks are on their feet at any hour of the day or night. Things like core areas and home ranges become meaningless as the mature males of the species pant and sweat and grind out the hours, searching for receptive females in a frantic effort to procreate during this short period of frenzied rutting activity. There is no better time to shoot the biggest buck of your life. You wait for this window of opportunity all year. Don’t spend it in the wrong spot. I hate that I spent so much of my life sitting in the wrong tree, but that is the nature of learning. Back in the 1970’s growing up in Iowa, I had no idea the potential that I had available at my fingertips. While I lived in the wrong part of the state for consistently producing big bucks, the big bucks were within reach; only a couple hours’ drive away. But it took a long time to figure out how to put one of them in front of me. I would find a beaten-down trail or an area torn up with rubs and scrapes; then put up a stand. By the 1990’s I was finally beginning to figure it out. I finally killed a couple really nice ones and today, I travel all around the Midwest looking for mature bucks every year. My frenzy of rushing from state to state, putting up and taking down stands, checking trail cameras and walking miles and miles looking for fresh activity resembles the buck’s rutting activity for those three magical weeks. But I have learned to be more efficient, and because I mostly hunt public land, I often find that the best-looking, obvious spots already have a treestand when I get there, and in many cases, have so much sign of human activity that the mature bucks of the area have learned to avoid them. Before hunting any area, I spend some time looking over aerial photographs on Google Earth to find potential stand sites. Then, upon arrival, I look them over in person, taking note of the sign and the lay of the land. I want to know that when I put up a stand, it will be in a location that I can sit for a long period of time and the only way a fidgety guy like me can park his butt in a treestand all day is by having a supreme confidence that I am in a really great spot. Particularly on those public areas and other lands that get a fair amount of hunting pressure, that spot is likely to be a site that most other hunters wouldn’t recognize. Here are brief descriptions of three great hunting spots that most hunters would overlook. River Bends I killed a 6-year-old buck on public land in Iowa a couple years ago on the 12th day of my seven-day hunt. I found a lot of sign of deer activity on the outside of a large, sweeping river bend on the fifth day of the hunt. Once in a stand, I began to see deer movement including one nice shooter buck, but most of the movement was out of range, so I had to adjust a couple times. I had moved my stand about 100 yards twice over the next few days before I settled on the exact spot where I killed that old warrior. The location was where the outside bend of a river swept up against a steep bluff, which funneled the deer movement into a narrow corridor. This was a river that the deer could easily cross, in fact they can cross any river if they want to bad enough, but they much preferred to take the long way around and a distinct trail developed on a shelf along the steep bank. Deer, like all animals take the path of least resistance when travelling. They are looking for places that it is easy to walk and that’s where the trails develop. Any shelf along the riverbank from the top to the bottom of the step bluff will have a distinct trail on it, and it will have the tracks of not only deer, but those of raccoons, coyotes, and all critters that roam the forest, because they all prefer to travel the easy route. This was a perfect place to intercept a buck that was pounding the pavement because it very naturally channeled the deer movement into a narrow area, an area where I could easily cover with a treestand in the right spot. Jumpers I kind of lucked onto this type of location. I happened to see a buck come out of the tip of a draw 100 yards away when I was sitting in a treestand in a bushy fencerow. I rattled at him, but after a short look towards me, he crossed the top of the hill and entered the point of a draw on the other side. After that morning’s hunt, I walked over there and was surprised to see a series of rubs and a small trail with several sets of big tracks in it. I realized that it was a perfect place for a buck to jump from one drainage to another with minimal exposure. He was only in the open for a very short period; it was an ideal shortcut. Frankly I don’t know of very many people who hunt these places I came to identify as “Jumpers,” but they can be absolutely dynamite if you find one in the right spot. These drainages may be referred to as hollows, ditches, draws or ravines depending on the local jargon, They
Every Deer Hunter Should Master These 3 Essential Calls
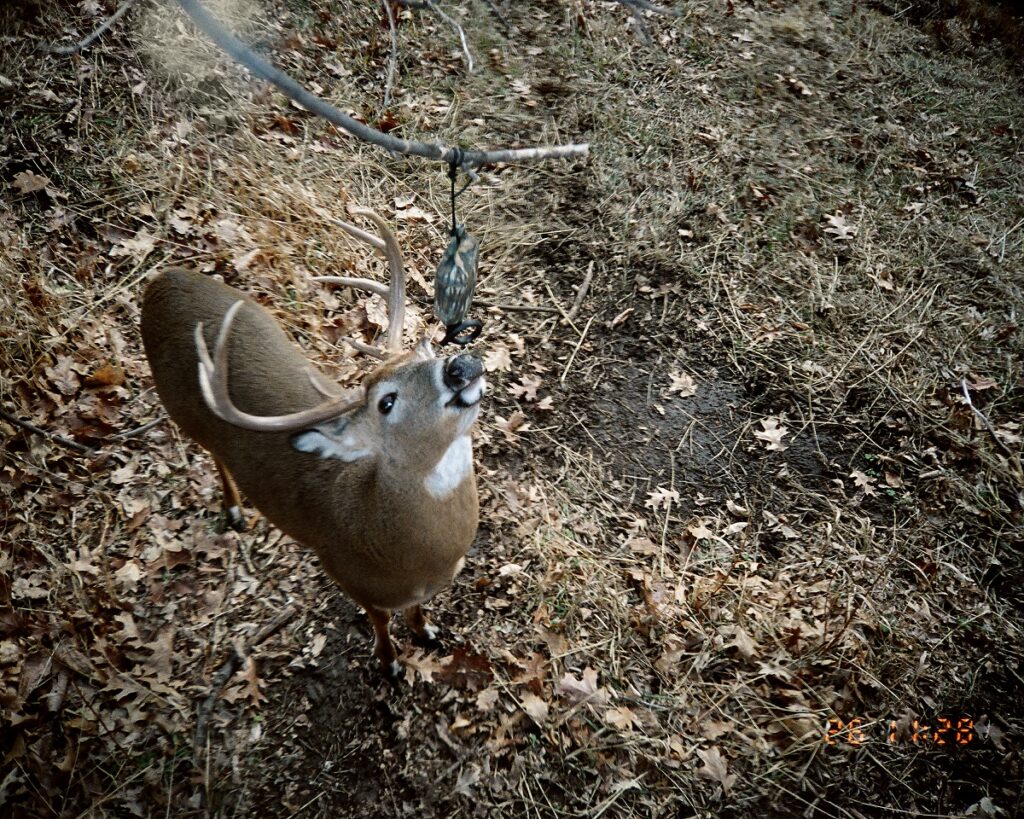
Using calls to bring in a buck can be hit or miss and many hunters just give up trying. But if you learn to use these three calls in the right place at the right time, you will be a believer. By Bernie Barringer It took me four years to draw the nonresident Iowa deer tag that had me sitting in a tree in the southeastern part of the state. I was positioned at the head of a steep ditch leading down into a woodlot, but I was surrounded on three sides by tall CRP grass. Typical of Iowa, it was a very windy day. About 100 yards away, a buck’s head appeared above the tall grass and his headgear made my heart beat a little faster. The mature, thick-antlered 10-pointer was walking from right to left, heading to the next ravine. I pulled a call out of my pocket and put it to my mouth. The Buck Roar Now back up 20 years or so. It was in the early 80’s when I first heard a buck make the loud guttural grunt that has become known as the “roar” or “growl” depending on who is selling the call which tries to imitate that sound. Let’s just say it was the loudest, distinctive grunt I had ever heard. It was an aggressive sound and I knew it would bring in a big buck if I could make that sound. I spent years trying to imitate that sound with grunt tubes but nothing worked, mostly because they turned into a squeak when you try to get the volume you need. Then Primos introduced the “Buck Roar” and I finally had a call in my hand that could make that sound. In order to overcome the rushing wind on that November day in Iowa, with a buck 100 yards away, I blew into the Buck Roar as hard as I could, “BLAAAAAAAAAT!” Just like in the movies, the buck turned and walked right to the base of my tree where I watched my arrow slice between the ribs of my largest buck to date. This call has limited application, but when it’s right, it’s super effective. For mature bucks that are on the prowl looking for action, they simply cannot resist the urge to check out the source of the sound. The reason? Because bucks make this noise when they are in the presence of a doe in heat that just won’t let them mount her. This is a frustration sound bucks make when they are just hours, sometimes minutes from being able to breed. Any buck who hears this sound knows it means there is a hot doe in the vicinity and he is going to check it out. Doe Bleats Grunt tubes can imitate the sound of a doe bleat, but are better for just imitating the grunting vocalization of a deer. Deer hear these ordinary grunts every day and rarely pay much attention to them. Cut the can type calls that you turn over in your hand do the best job of imitating the drawn-out bleat that really gets a buck’s attention. It’s a variable-pitched wail made by does when they are in heat or in trouble. It’s a doe’s way of saying, “here I am, come over here.” This sound will call in bucks you can see or can be used blind in an attempt to call in deer that might be in the area within hearing. I use this call from time to time whenever I am hunting near a bedding area. The key to this call, and any call for that matter, is using it in an area where there is ground cover or a terrain feature the deer cannot see over. If a deer can see the area around your stand and don’t see any deer that could have made the call, they are probably not going to come. When the deer is coming, stop calling. Call again only if they show signs of losing interest or start moving away. Rattle Right Many hunters have had little to no success with rattling, and that’s usually due to one of two things. Rattling works poorly when there are few mature bucks around or if the buck-doe ratio is out of balance. You need to be in an area where there is a good number of mature bucks and there is a lot of competition for breeding. Where I live in Minnesota, does far outnumber bucks and there is little fighting and interaction between bucks during the breeding season. Every buck gets in on the action. I have had excellent luck bringing in bucks with rattling antlers in other states. Bucks are remarkable in their ability to pinpoint the source of a sound. I can’t count the number of times I have rattled antlers and had a buck run literally right to the base of my tree. I groan at the memories of being caught with the rattling antlers in my hand when I first see a buck staring right at me, preventing me from getting off a shot. For this reason I have become more conservative in my rattling. I no longer crash the antlers together for long periods, which increases the odds that a buck is going to sneak in and catch me off-guard. My typical sequence starts out with 15-30 seconds of light rattling in case any deer is nearby. Then after about five minutes, I give the rattling a little more gusto for 15-30 seconds. After another five minutes, I use 2-3 periods of about 5-7 seconds of rattling as hard as I can with about 30 seconds in between. If any deer are going to respond, this offers the best chance of attracting them without having them pinpoint your location. Learn these three calls and you will find success with them if you use them in the right places at the right times. With all calling, make sure you are positioned
5 ways to stop a deer in your shooting lane without spooking it
Shooting at a moving deer with a bow can be a big mistake, but trying to stop him can be just as risky. Here are some tips to bring him to a halt without alarm. By Bernie Barringer If you watch outdoor TV, you have seen it a hundred times. The show host is in a treestand and here comes a buck. The host needs to stop it for the shot so he or she lets out an “Uuuurp!” and the buck does one of three things, all of which are bad. Either the buck takes off, keeps walking, or slams on the brakes and stands there all tensed up, ready to take flight at the slightest sign of danger or the noise of a bowstring. That deer just went from relaxed to alert with the sound the hunter made, which is the perfect recipe for “ducking the string,” which is actually the process of loading the muscles for flight, but it usually means your arrow flies right over the buck’s back. There must be a better way. Can we stop the deer in our shooting lane, right where we want them, without putting them on edge? Well, there are actually five better ways that I can think of. Try one of these. Scented Key Wick Hanging a key wick with some deer urine on it is the best way I know of to stop a deer without alarming them. I like to hang it about five feet high and right in the trail if possible. Every buck will stop and smell it, if only momentarily, but they will pause just long enough for you to get off your shot on a standing, relaxed deer. I like the key wick because you can pull it off the branch and drop it into a sealed plastic bag; you don’t want it there when you are not. Visual Distraction Just about anything sitting in the trail that’s out of the ordinary may cause them to pause for a moment. I know of someone who uses a small orange surveyor’s flag. He claims a small bucket works too. Deer are curious animals, and any small man-made object free of human scent can work. An Apple Core This is not legal in all areas because some conservation officers might consider it baiting, so check your state and local laws before trying it. Eat an apple and drop the core on the ground where you want the deer to stop. Works every time. I’ve never had a deer walk right on by an apple core. I usually eat the apple on the way to the stand and then drop the core before I climb the tree. You could eat the apple in the stand and then toss the core, but that has never worked for me; I guess I’m not that good at tossing it accurately because it usually rolls to a stop a few feet from where I would really like it to be. Thread A piece of black sewing thread stretched across a trail can be just what is needed to stop the deer. They feel the pressure, and although they usually push through after a moment, they will often pause just long enough for a shot because they feel something they cannot see, which confuses them momentarily. While this technique works, it has its shortcomings, which I found out the first time I used it. A buck came following a doe, which paused perfectly when she hit the string, then moved on through, breaking the string. Needless to say, the buck didn’t pause in my shooting lane. Some Deer Hair This is one of the best ways I have found to stop a deer, second only to the key wick. A handful of hair off a previously shot deer can be dropped right in the trail. Any deer that comes by just can’t seem to help themselves, they have to stop and have a sniff. Their head is down, they are stopped in your shooting lane and they are distracted while you draw your bow or raise your gun, settle your sights and shoot. Perfect. The “Uuuurp!” might work, but don’t chance it. A grunt call in your mouth can work too, but then you… well, you have a grunt call in your mouth when you need to shoot. Use one of these much more effective ways to stop a deer and you will be shooting at a relaxed deer that is less likely to duck the string. That significantly increases the chances you will be eating that deer instead of talking about it.
Late October Whitetail Madness
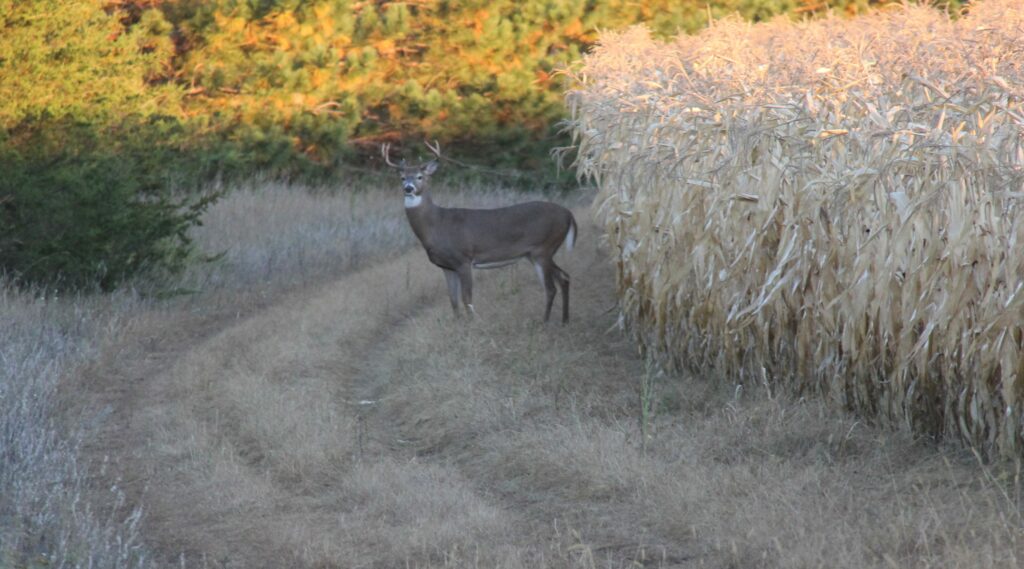
Many hunters wait to hunt hard until the month of November when the bucks are running crazy and the rut is in full swing. That can be a mistake, because the last week in October can be one of the best times of the year to tag a mature buck. By Bernie Barringer I love the last week in October. The first signs of the rut are appearing more and more by the day. Bucks are getting edgy and this offers several advantages to the DIY hunter. Don’t get me wrong, I love the month of November too, and I’ll be somewhere hunting whitetails the first two weeks of November as long as I am physically able, but the end of October, in my opinion may be the most overlooked time period of the year to catch a big buck off guard. Scrapes This is the one time of the year when visits to scrapes take place in the daylight. It’s the one time when I consider hunting over an area all torn up with rubs and scrapes to be well worth it. During November, bucks will mostly visit scrapes under the cover of darkness, or cruise by downwind to scent-check the scrape. But during the last week in October, they are more likely to walk right up and give it a few strokes and a fresh dose of urine rubbed through the tarsal glands. Find an area with several active scrapes, set up downwind of it and put in your time. One of the best ways to keep the bucks’ attention on a scrape is the addition of a scrape dripper that keeps the scent coming. A dripper allows a slow application of fresh deer lure to the scrape itself, and bucks really pay attention. This can be the difference between having a buck circle 30 yards downwind to scent check the scrape, versus walking right out in front of you and offering a shot. Scrapes with scent drippers are the perfect place to place a game camera, too. You will get a photo of most all bucks in the area within a few days, which allows you to inventory the deer. Rubs Rubs are more than just sign that a buck was there at one time. Rubs are signposts to which all deer pay attention. Rubs offer clues to the direction deer are travelling and they line up in such a way as to offer good information about the routes bucks prefer to take. Signpost rubs offer the best chance to tag a buck of all, because they are visited often. Look for large rubs on big trees that show signs of frequent use. If you find these big signpost rubs near the edge of a food source, you have significantly increased your odds of finding the place the bucks will enter to food. It’s a great place to set up a stand. Lures Scents and lures work best in this pre-rut period. Mock scrapes or natural scrapes with a scrape dripper and some Active Scrape or Estrus lure will be checked out periodically. Bucks are feeling the urge at this time and are more likely to come to scent that they will be in a week when their nose is full of the real thing. Remember what I said about the bucks circling downwind? They are reluctant to come to a primary scrape on the edge of an open field during the daylight, so they just scent-check the scrapes and don’t actually visit them unless something smells good enough to pull them in. A good lure can do just that. Calling The end of October is a great time to use calling and rattling to bring in a buck. Bleats and grunts are sounds that appeal to a buck’s sense of curiosity. They are often just rutty enough to walk over and check out the source of the sound. Choose a good calling site where the deer cannot see the area around the source of the sound. Calling or rattling may be just the right tactic to bring a buck out of his bed during the daylight. Set up on pathways that lead from the bedding area, using the wind to your advantage and rattle the antlers periodically during late day hours. Some gentle ticking of the antlers together may be enough, but don’t fear creating a racket by imitating an all-out brawl. Sometimes a lot of noise is what it takes to get their dander up and cause them to make a move. The huge majority of DIY hunting trips take place during November; that’s not likely to change any time soon. Consider breaking the pattern to take advantage of the last week of October and the opportunities it presents. The rut, with its frenetic activity has its appeal, no doubt, but there are some real advantages to getting there ahead of the crowds. You just may find you have the woods, and the deer, to yourself.
How to Beat the October Lull, a week by week guide
Too many bowhunters stay home during October because the reputation of the “October Lull” has them discouraged. Here’s how to improve your success during each week of this maligned month. By Bernie Barringer In the past, I never really got serious about my deer hunting until the rut. I’m definitely not alone in that regard, many bowhunters ignore the opportunities the month has to offer. Certainly, it’s not like September when the bucks are visible and on predictable daily routines, or November, when the bucks are running around in a testosterone-induced stupor. But October has some advantages, although each week brings new challenges and opportunities. Week 1 The thing I like most about the first week in November is the opportunity to hunt in pleasant conditions without mosquitoes. The early frosts have eliminated the pests and turned the woods colorful and it’s a great time to be outdoors. The deer hunting locations for me mainly revolves around food in the evening and bedding in the morning. The movements have some regularity to them and with the help of scouting cameras and observation; you can find a buck to target. Another advantage to this time is the solitude. Since most bowhunters are waiting for the rut, you can have the woods to yourself. It’s a great time to hunt the public land that will be full of hunters in November but will have few fresh boot prints in October. Week 2 These advantages carry over into the second week, as well, but you can add food into the mix. Crops are being harvested and cut cornfields become magnets for the first week or so after they are harvested. Deer move into these fields because the acorns are getting cleaned up and the readily-available missed corn is easy pickings. Ears of high-carbohydrate lie on the ground in plain sight and deer migrate to these areas en-masse. As the weather gets colder, bedding areas become more predictable. Overcast, windy or rainy weather sends the bucks into the thickets where they have some protection from the elements. Savvy hunters who know where these areas of thermal bedding cover are found can take advantage of the deer as they move out of the cover in the evening to feed, or back to the cover in the morning. Week 3 By the third week in October, the effectiveness of calling and rattling is rising. Scrapes and rubs are everywhere, but not being checked often just yet; still, they are excellent places to make some noise. Setting up over early rut sign and rattling can be very effective at this time. The last two weeks of October and the first week of November are the only times when I feel that blind calling is effective enough to be worth trying. By blind calling, I mean making attracting noises without actually seeing a deer to call to. Blind calling with a grunt call and rattling must be done from the right location, however. Avoid areas of open timber where the deer can see long distances. If they can see the area where the sound is coming from but don’t see a deer, they probably won’t come. A decoy can help, but better yet, put a barrier of some sort between you and where you expect the deer to be. Even a small rise in terrain that they can’t see over can be enough to make them walk over there to investigate the source of the calling or rattling. Week 4 The success of calling and rattling continues to grow through the last week in October, but the real area of focus is the sign. Those scrapes that were mostly undisturbed during most of the moth are suddenly getting a lot of activity. Areas all torn up with scrapes and rubs can be excellent places to park yourself in a treestand for long hours during the end of the month. Here’s a key tip, get downwind of the area, particularly if those scrapes are found along the edge of a field. Bucks avoid exposing themselves to open areas during the daylight and they are unlikely to walk right up to a scrape along the edge of a field unless something really attractive hits their nose. They will often work those scrapes from 30-40 yards downwind, from the cover whenever possible for them to do so. Keep this in mind when you choose the right tree for your stand. The final week of October offers the best chance of the entire month to attract a buck with a good deer lure. I have had excellent success using a scrape dripper with some Special Golden Estrus or Active Scrape to keep fresh scent going into the scrape during daylight hours. Warm daytime weather causes the dripper to expand, making it drip scent into the scrape. Cool weather at night causes the scent to contract, pulling air back into the container where it stays until it warms up. The advantages of having fresh scent applied only during daylight are obvious. So don’t give up on the maligned month of October. Sure this time period has some challenges, but if you focus on the advantages, you can be wrapping a tag around a buck before most hunters are getting serious about their hunting.